Unity

First of all, we created a new project and got just a plain view, without any background. Then moved into into importing few features like characters and environment. Assets -> Import Package -> Environment/Character. At the bottom bar, we see that a section appears with 'Assets -> Standard Assets'.


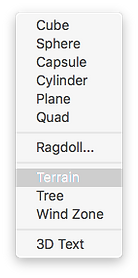
After, we had to create some surface, which we did by going to Game Object -> 3D Object -> Terrain. This function lets us to create a surface, which we could change by using different brushes on the right side bar menu.


Adding Textures.
To add textures, we moved to the right side bar again and in the 'Terrain' section, we have 'Paint Texture'. We click on 'Edit Textures' and we see window, which asks us to select the texture.
We pressed on select button and another window posed out with different kind of textures.
I selected the Green Hill one and applied. If we would like to improve our our environment by adding extra textures, I just repeated everything again and by using brush painted places, that I wanted to look different.


We did the same by adding trees and a grass. Right side menu bar and just selecting to add any of them to the scene.
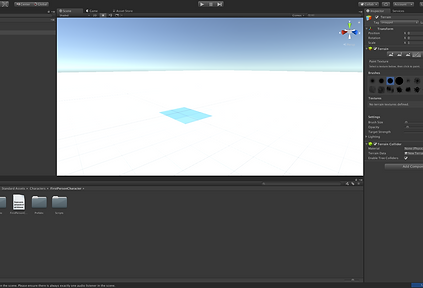
When we created our scene, tried to walk around in our environment. To do that we had to go at our left bottom bar and click on 'Assets ->Characters', 'FirstPersonCharacter -> Prefabs -> and move 'FPSController' to the scene.
By doing this, we can use arrow controls or 'A/W/D/S' to move our character round the scene, as well, for jumping - SPACE bar.
Last, but not least, to make the rigid bodies we went to GameObjects -> 3D Objects and selected CUBE. Made ir Rigid body, duplicated and we could see how it is falling from the sky in our character mode.


Substance Painter
 |  |  |
|---|---|---|
 |  |  |
 |  |
Today, we tried a new program called Substance Painter. This program helps to achieve realistic looking materials, colours.
This time, we tried in our interactive environment created with Unity, import an object created with Maya and improved by Substance Painter.
We tried to create Nuclear Bunker on Maya. First of all, I created a cylinder and a cube and just use an extrude tool to make the shape, that I wanted. After, to make sure that in Substance Painter everything is laid out properly, I had to lay everything on Maya first. Select the object -> UV -> UV editor -> automatic. In the end, I just exported my object and saved as .fbx file.
I opened my substance painter and imported my object. At the bottom bar, I selected smart materials and applied on of them by dragging the material into the layer section and pressed bake, to make sure, that I see my materials at the best quality I can.
In the end, I had to export my the textures into the selected folder and save them. Then open Unity and go to Assets -> Assets Standard folder, press right mouse click -> Create -> Folder, name it somehow and just drag those materials from the previous selected folder in to our new one created in the Unity alongside our Maya .fbx file. Then I created a new material, dragged my main (yellow/rusty) material into the right hand side bar section called 'Albedo', second one into 'Specular' and the last into 'Normal Map'. Then just dragged my object into the environment and dragged the material onto the object.
Pirate Island
Creating an Island:


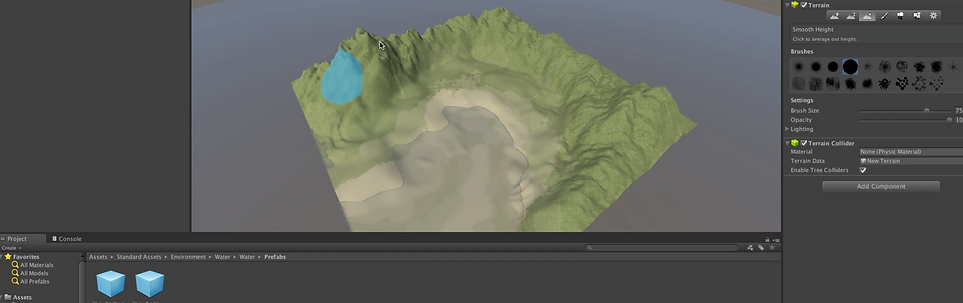


I created the terrain and by using different brushes, I made the surface curvy with some mountains. Since it is the island - water is necessary, which I found is Assets (Environment) folder and added (scaled) on my island.
SOME REFERENCES:


I chose references from the a game called 'Assassin Creed : Black Flag'. This game has incredibly detailed pirate island and as well great ideas for my island.
Modelling:


In the first two pictures, I was modelling a small storage house. It was made by mainly using cubes and duplicate function.
In the following three images, I was making debris, rocks. I used a sphere and in vertex mode and a soft tool, changed its shape. After that, I went to 'FX' mode and Effects -> Shatter, and shattered pieces of the object.
In the last picture, I was modelling a rope. Created Cylinder -> deleted all faces and left just the top, duplicated and used a Curve tool to make the shape of the rope I wanted. In the end, I extruded and made high poly, so that my rope would get a shape and finally used a twist function.
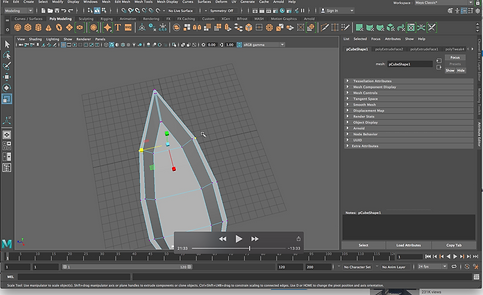


To model objects, I was using Maya and a low poly technique. Objects were simple, created mostly by using 'Extrude' function. As well using 'Smooth' and increasing divisions, to make it easier to apply textures in Substance Painter.
Texturing:


To put the materials on, I was using Substance Painter. I mostly used 'Smart Materials' and just changed couple of options and colours to change the look. Other objects were done using same technique.
My Pirate Island:


Pirate Island!
JAMES BOND SEQUENCE
James Bond: Land Of The Rising Sun
References:


Adobe After Effects : Text Editing & Effects
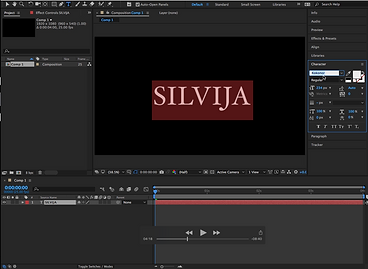
In the Adobe After Effects, we were looking up, how to add effects to the text itself. Adobe Effects has a good variety of different and powerful effects, that could be used for different kind of projects and compositions.
Today we tries one on the effects called "CC Pixel Polly', which divides text in particles. To make it more attractive, we added a glow effect and by choosing different parameters that is what we got. (Shown in the pictures below)