Stonehenge Exercise
This is a photo exercise explaining photoshop layers, selection tools and saving files.
I selected on image on top of the other, then removed the background so the top of image would reveal a stormy sky, from the lower image.


Past, Present and Future

Past: Meaning behind a collage
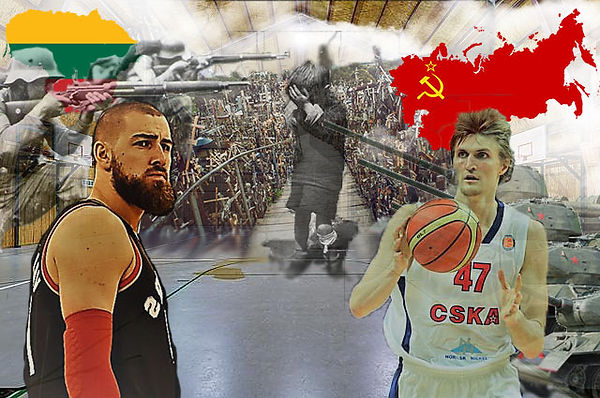
First collage is about the Past. I connected two countries. Lithuania and USSR. In this collage, i am trying to show struggles of Lithuania, a massive difference in power, and a hope. Hope of people, who did not give up and fought.
Huge revolution happened, when Lithuanian basketball team won against USSR and became on of the best ones worldwide.
Technique
First of all, I created a background, which is a basketball court. After, I tried to make a 'path of hope' which is a picture of The Hill of Crosses, which is based in Lithuania, lowered the opacity, to give it a ghostly look and with a Smudge Tool, I blended colours of a background and the bottom of The Hill of Crosses. Then added some clouds (shift+A -> shift+C->shift+V) for the general look. Put the flags on it and partisan man + tanks. Tried to make it look like a long past, so lowered opacity again, blurred sharp ends with a Blur Tool. At the end, I added basketball players and just slightly lowered the opacity.


Green Screen
Editing green screen. I took two pictures, a women and a blue sky. How to make it look, so that women would be in the blue sky : Copy Women's pic, paste into a blue sky's pic. Select->Colour Range->shift+select green screen areas->invert. (White colour keeps the image we want, black will be seen through. To get rid of green colour (Colour Bleed): Adjustment layer->Hue/Saturation, move mouse on the green colour and move it to the left.


Abandoned Building


I had 3 pictures. Task was to make it look abandoned. First of all, I copied the building pic and pasted onto the sky. Then with quick select tool. I selected building and trees part and added a mask. Secondary, I took the rust pic and pasted onto the building. Select a burn tool and went into the places that I wanted to look a bit darker and even. Then: Select->Reselect and lower the opacity, so the building would look rusted. After I loaded 'Abandoned_City' file, with a brush, selected a chosen brush shape, took a colour from the picture and painted a small bushes on the building.
Present:

In this collage, i tried to show a current event, which is actual to most of us. BREXIT.
I chose spacecrafts from the 'STAR WARS' as a background layer. After, I decided that these spaceships has to be indicated by the flags of UK(smaller one) and to show majesty of EU, which is a larger one. After adding mask, and transparent pictures (lowered the opacity), I used a blur and smudge tools, to make it look, like these pictures are actually connected. On a smaller space craft I added PM's face, by reducing image size and pasting into the spaceship.

Future: The Revolution of AUDI

In the future collage, I wanted to compare and show the transformation of a car. Namely, AUDI.
At first, I had to think of an idea, which was to show, how a man kind evolved and invented something, that some time ago seemed like a dream. In the end, I decided to show, that man is a magician compared to what he has done.
The background I chose was a colourful, galaxy looking-like. Next, I found a png file, which was an engine picture, made it larger and pasted into the background. After that, I took a man's photo, selected man's silhouette and Select->Inverse+deleted the background and pasted into my collage. Later, added a box and smudged the bottom of a man and the light coming from the box., Pasted a hat and moved on a mans head. Found a png old Audi picture, reduced the size of an image and pasted into the collage. Added a text '1988'. Last step was a bit trickier, because i had to remove the future's Audi background, which I use Eraser tool, reduced the size and pasted into the final image as well. Added a text '2080' At the end, i just added some sparkles, by finding a png file and reducing the size.


Alexander Rodchenko

1891-1956
As a key figure of the Russian modernist movement, the art of Alexander Rodchenko helped redefine three key visual genres of modernism: painting, photography, and graphic design. In his paintings, the artist further explored and expanded the essential vocabulary of an abstract composition. His series of purely abstract proto-monochrome paintings were influential to artists such as Ad Reinhardt and the Minimalists of the 1960s. In the field of photography, he established unprecedented compositional paradigms, which in many ways still define the entire notion of modern photographic art. Rodchenko's involvement with the Bolshevik cause further propelled the appreciation of his art in the leftist circles of the American avant-garde.


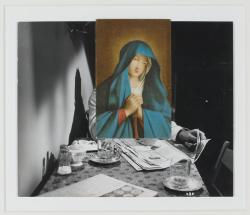
John Stezaker

John Stezaker’s work re-examines the various relationships to the photographic image: as documentation of truth, purveyor of memory, and symbol of modern culture. In his collages, Stezaker appropriates images found in books, magazines, and postcards and uses them as ‘readymades’. Through his elegant juxtapositions, Stezaker adopts the content and contexts of the original images to convey his own witty and poignant meanings.

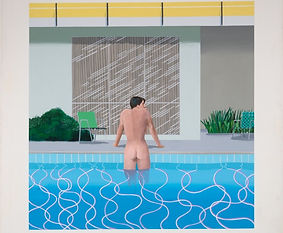
David Hockney

Like other Pop artists, Hockney revived figurative painting in a style that referenced the visual language of advertising. What separates him from others in the Pop movement is his obsession with Cubism. In the spirit of the Cubists, Hockney combines several scenes to create a composite view, choosing tricky spaces, like split-level homes in California and the Grand Canyon, where depth perception is already a challenge.
Hockney insists on personal subject matter - another thing that separates him from most other Pop artists. He depicts the domestic sphere - scenes from his own life and that of friends. This aligns him with Alice Neel, Alex Katz, and others who depicted their immediate surroundings in a manner that transcends a particular category or movement.

AUTODESK MAYA 2018
First modelled room in MAYA

Original Image

Slightly darker lightening
It was quite a challenge for me, could do better, but I am already happy with my first result.
Process was quite long, figuring out the conception itself. Looking for a room image, figuring out, where to start. So, my first step was to upload a room image, so i could look at it, while modelling. Later, i decided to make a wall, by choosing Polygon Plane, and rotated , so it would make a wall.


Secondary, I created a TV table, by making a Polygon Cube and adjusting the size. After that, i created small castors for a table and added to it. DVD and TV modelling process was very similar to a TV table's, but shelves were a challenge to do.
It was quite a challenge for me, could do better,
The process was hard for me, I tried the same one shelf to make maybe ten times, until I understood how each button works and what does it mean to make an empty space in a cube.
For shelves i used Polygon cube again, but this time, i created 3 smaller ones as well. Connected the smaller ones in to a main shelf part and designed that those three smaller cubes would be substitute for an emptiness, that had to be created. Went back to the Object Mode, by clicking a Left Click and marked The main shelf part as well as the smaller cubes later. To make and empty space in the main cube i went to Mesh -> Booleans -> Difference. After that i used 'Insert Edge Loop' in a Mesh Tools section, selected edges of my new shelf and smoothed it. Rest parts of the shelves I done by the same process.
Last, but not least was sofa and two smaller couches on it, which had pretty much same process as other room parts.


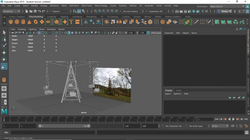
Creating a spaceship (extrude function)


First of all, we got a Cube. Fixed the width (10), high (2), depth (6) and width, height and depth subdivisions into a 3/1/3 (Channel box on the right side toolbox) and started modelling the spaceship by using Right-click->faces->extrude. That is how the spaceship was modelled -> just by extruding the faces and smoothing the spaceship by pressing number '3'.


Second part of the modelling was a bit trickier. Adding the material and colour.
I selected the object -> right clicked -> assign new material -> arnold shader ->aistandart surface -> colour change. On the right side toolbox, I changed some precets for this node as well I selected a lightly purple colour. In the end, Icreated a floor and by extrude function extruded all the way to the top and smoothed it out.


What I learned in this lesson:
1. Physics are extremely important! It has to look and feel real.
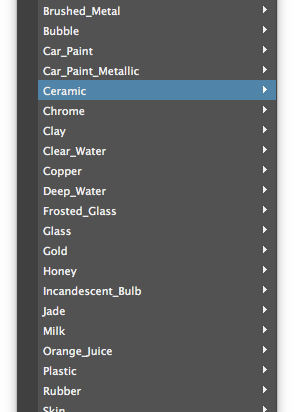
2. Throwing material (right click -> assign new material -> arnold shader -> aistandart surface -> colour change.
3. Precets (on the right toolbox) - to attribute the precets for a node.
4. Delete history to organise the job and make it less complex - Edit -> delete by type -> history.
5. More polygons - sharpening up the object
6. Bridge tool -> select two separate cubes (on the same object) and make a bridge between them.
7. Booling -> one shape scopping out of another.
8. Mesh -> Combine. Makes separate objects into a one.
James Bond Gadget

My James Bond Gadget is a table fan with legs and monitoring eye in the middle.
First of all, I created one blade with a EP Curve Tool. Then I extruded my blade. I used an Insert Edge Loop tool, to make corners more sharp.After, I rotated it, selected my blade. moved its transform manipulator, to the centre, where i wanted my fan blades to be around and went to Edit and Duplicate Special, selected 4 as my number of copies and scaled everything by 90 degrees. That is how I already got a shape of a Fan. Next, I had to use a Polygon Cylinder to connect all the blades and make a cage, by choosing Polygon Torus (making it quite thin 0.2), duplicating it 2 times and scaling to make it smaller. By using a front view, I had to make a net. First, I selected a Cylinder and made it very thin (0.12), then by using Extrude tool I extended carefully all the way to the top and by choosing Vertex mode, I selected polygons and rotated to look more perspective and smoother.
Later, the process was very similar, by moving a Move tool manipulator to the centre of my fan, I went to Edit, Duplicate Special and rotated it by 18 degrees and made 20 copies. I selected my net frame and made it into a one object by clicking Mesh -> Combine. To finish my cage, i had to create the other side of it, all I have done is just duplicate and rotated to the other side. By using Cylinder, I made a 'connection' between my fan blades and cage. and made it into a one object as well, to make things easier. To make it even more easier, I deleted my history which I could find on Edit->Delete by Type->History.


Again by using Cylinder and a Cube, I created a stand. For the Cylinder, I used Edge Loop tool and Extrude tool, to go from thing to thick and just a scale tool by using Face mode and choosing a front face, then scaling it down. Last part of modelling was to make legs and an eye. Legs were really simple, I selected a Cube and just extruded, after using Edge Loop tool, made it look more sharp, duplicated and connected to the fan. To make the eye, I used two Spheres put on each other.
Last Part was colouring, I selected my object and pressed right click-> Assign New Material-> Arnold airStandartsurface and just added colours to it. By selecting different places, I selected faces and coloured them.


And that is my final James Bond Gadget


Using a reference image for my James Bond Gadget:


To put the background for my gadget I went to View -> Image Plane -> Import image and selected it as my background. After, I adjusted my object, which is by using front, perspective, side and top cameras, so it would look, that my object is on the keyboard. After that, I had to make the light by going to Arnold -> Create light Area and Create light Port. Adjusted the light port, made it big enough to light my object and made sure that my camera settings are high enough.


That is the rendered version :

Self practise:
Based on the Youtube video (https://www.youtube.com/watch?v=xzmg0grXHyE&t=675s) Low Pole Character Modelling
First of all, by using Image plane, I added my reference pictures (for the first picture, I used front -Z camera, for the side picture, I used side -X camera. And moved the reference pictures to the side, so I could create my character betwee the front and the side pictures.
These are my source images:


After, I created a square and by entering the front camera, I adjusted my square into a approximate of of a human chest and waist and Added two edge loops, where my object will have to change its form. I entered the vertex mode and adjusted vertexes along side the body waist and done the some in the side camera.


I smoothed the object to see if everything looks good so far and then started working on legs and arm shapes. By using Extrude tool, I extruded arms and legs with the help of front and side cameras. Matched the length, approximate size and smoothed it out again.


Throwing a texture


First of all, I created a cube and formed to match a wardrobe size. Then selected and pressed right click to add a material. Right click- new material - Arnold shader - aisurface.
On the right side tool bar,I selected a specular color and pressed on file Icon.
On the same right side toolbox, I pressed the file Icon and selexted the wardrobe texture file, that I wanted to apply for my modelling. By Going to UV -> Planner, I adjusted the texture and got my wardrobe.

New York Rooftops Project
References:


These pictures shows the references that I took for my 'New York Rooftops' projects. I tries to look for different angles, sharp corners, that shows more than a one side of a building. I look for the rooftops, that can be clearly seen, with some water towers on them. Some of the pictures were takes using Google Maps method, which was incredibly valuable, to see everything with my own eyes and to analyze every corners and details. I tried to look for the pictures that has normal day light and are highly visible.
Project:
 |  |  |
|---|---|---|
 |  |  |
 |  |  |
 |  |  |
 |  |  |
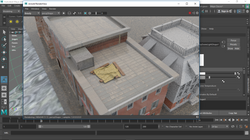
This is the first part of my Project. I tried to model the buildings, focused slightly too much on the details, but the result was quite good. I tried to use image planes as much as I could, by adding them to my project and using them as references for my modellings.
Final Part:


Time lapse Project
Three Ideas:
1.Chernobyl (Pripyat)
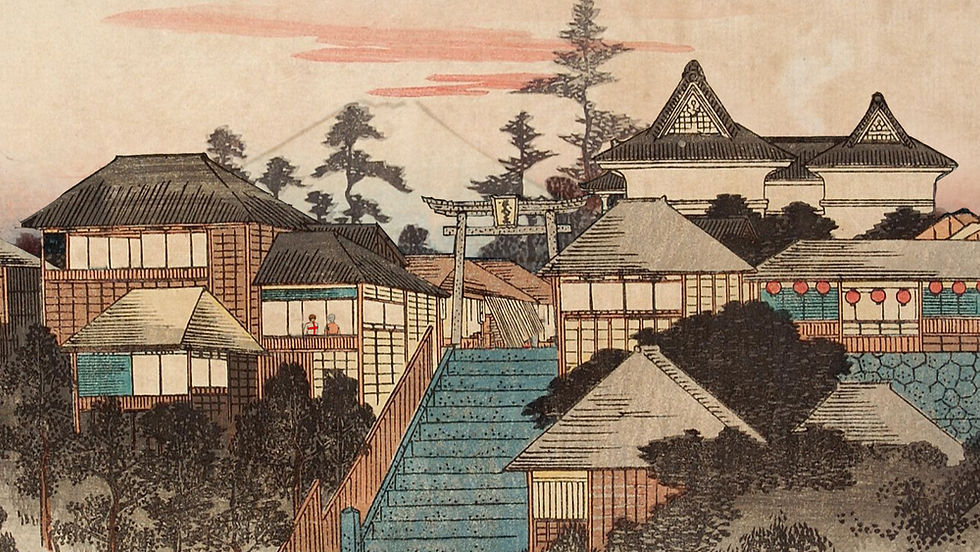
2. Edo Japan
3. Klaipeda Sea Port
1. Chernobyl (Pripyat)


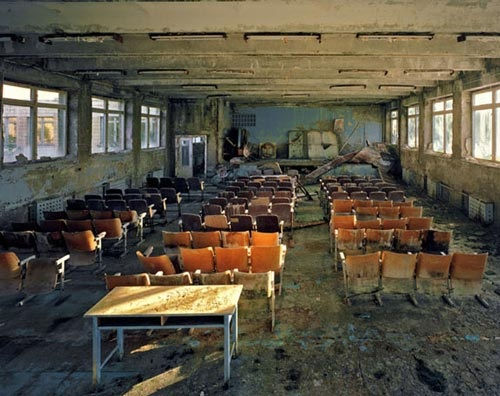
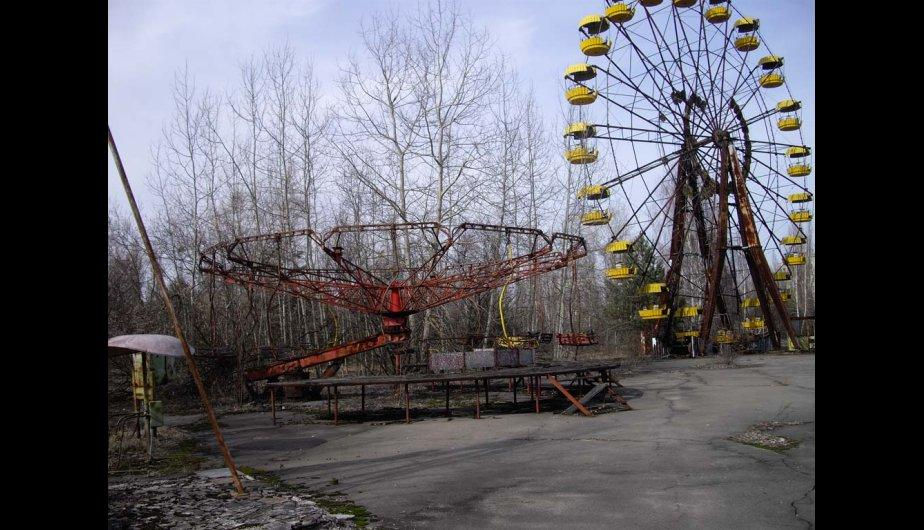


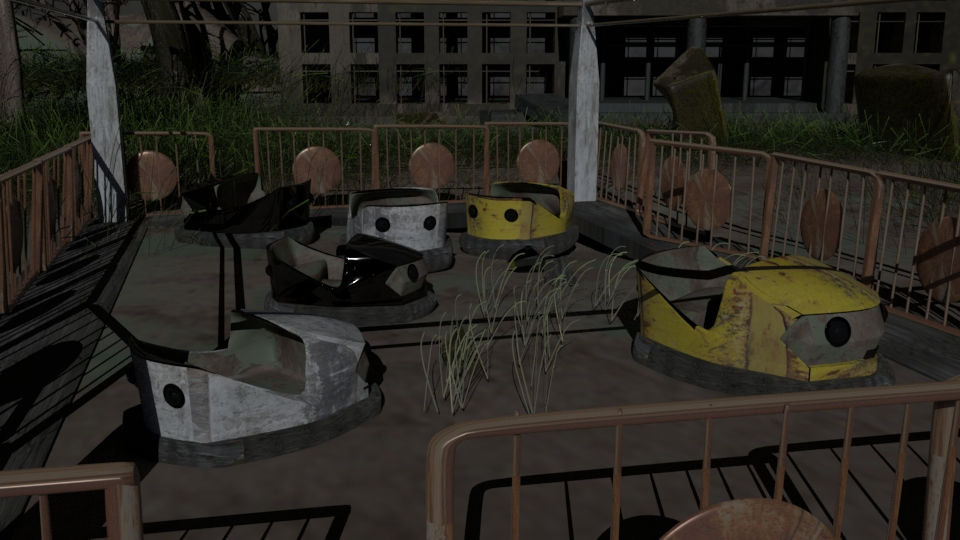
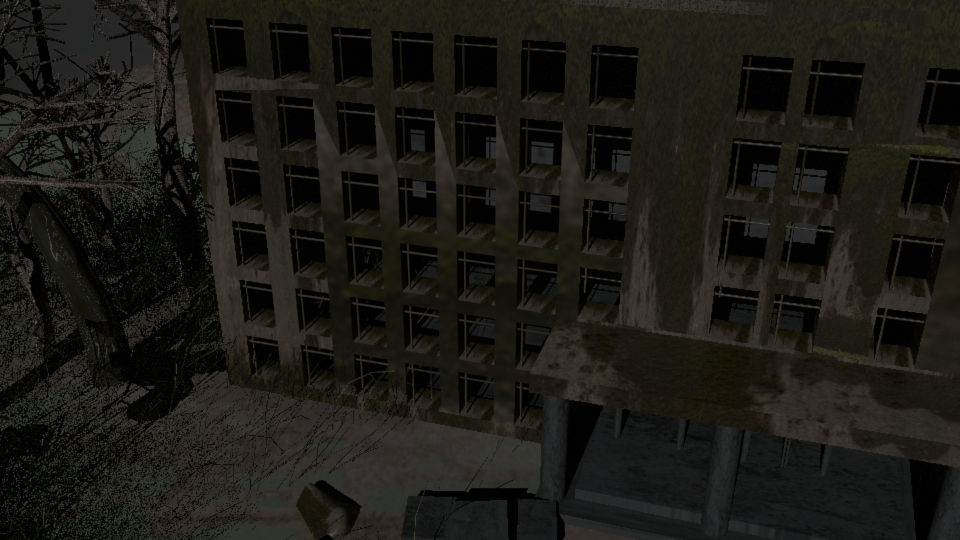
I would like to focus on amusement park, which was abandoned after the nuclear attack. I would add a run-down building, since buildings in the real Pripyat are quite far away from each other. There will be a lot of radioactive nature, which look weirdly and intensively green at some parts of the environment as well as died trees. My project will have a rusted wheel, cars and other attractions. I will add some dropped clothes, toys.
2. Edo Japan


![mini-samurai-sword-[2]-12374-p](https://static.wixstatic.com/media/11fbde_cfe567a7ea49461aa192003b4eb93d6f~mv2.jpg/v1/fill/w_980,h_524,al_c,q_85,usm_0.66_1.00_0.01,enc_avif,quality_auto/11fbde_cfe567a7ea49461aa192003b4eb93d6f~mv2.jpg)

In my Edo Japan, I would create a small bridge with a pond around, flower gardens, beautiful nature. Near those gardens, I would like to show a Japanese style castle or a temple, with bamboo doors, and exceptional style. As well, there would be a samurai helmet with a sword peacefully placed on the ground, near the Sakura tree.
3. Klaipeda Sea Port
 |  |  |
|---|---|---|
 |  |  |
 |  |  |
In Medieval Klaipeda Port, I would show a huge Viking ship and some small fishing boats around. On the ground, there would be some carts, fishing nets, paddle, wooden planks as well as some boxes and swords and other equipment inside them.
Time Leap Assignment (Chernobyl Project)
As my final assignment for this semester, I choose Chernobyl scene. I though it would be a perfect opportunity for me to dig into material, environment, colour and modelling area.
As everyone knows, Chernobyl is an abandoned town, which suffered atomic explosion. Due to this incident, people were evacuated as soon as possible, by leaving their stuff behind. By the time, metal went all rusty, buildings ruined and the nature took domination. Because of the high radiation level, grass looks weirdly green and because of the acid rains, trees are dead.
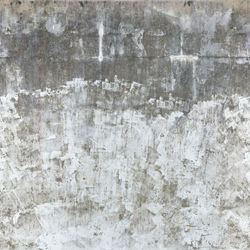
The reference pictures of my assignment are shown just slightly above. And on the right side You can see the textures and other extras that I was using for my project.
 |  |
|---|---|
 |  |
 |  |
 |  |
 |  |
 |  |
 |  |
 |  |
 |  |
 |
 |  |  |
|---|---|---|
 |
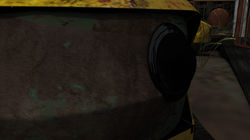
At first, I was struggling a lot with a Bumper Car modelling. I tried to make it out of the cube by using vertex mode and extrude tool. But it was pointless. When being smoothed out, it looked horrible. Then, I decided to use cylinder form and model the body first, then attach the rubber part and add a sit. It went out quite well. I was mostly using vertex mode, but touched some edge mode as well as edge loop.
When finished with modelling, I got another challenge. How to make it look all rusty? But not too mush as well. in the ...... photo, you could see, that my bumper car is covered in rust, but I did not enjoy the result, so tried to look up the Youtube and search how people uses double texture layer method. That is when I found out about Hypershade, which helped me so much, while organising my textures and materials.
 2018-01-03 (6) |  2018-01-03 (7) |
|---|---|
 2018-01-03 (8) |  2018-01-04 |
 2018-01-03 (5) |  2018-01-04 (1) |
 2018-01-04 (10) |  2018-01-04 (9) |
To make a double layer was not hard, but slightly complicated. In Hypershade window, I choose my material as a Layered Shader, then a box on the right appears, showing green colour screen, by clicking on it, I choose the file, this time was my rust, and then I press one more time on the green square, which duplicates and choose my secondary texture, which was metal. Then I had to create my default material which is Lambert and in the bottom tab square connect my lambert with metal texture, which game me incredible rusty coloured metal effect.
After, I was carrying on with my other modellings. As well, deciding how my ground is going to look like, composition, adding some grass and trees, adjusting their colour and light with shadows to make some good shoots.
 |  |  |
|---|---|---|
 |  |  |
 |  |  |
 |  |  |
 |  |  |
 |  |  |
 |  |  |
My Completed Time Leap Assignment
 |  |  |
|---|---|---|
 |  |  |
 |  |  |
 |  |  |
 |