Photoshop Exercise/Week 1

This is a photoshop exercise, which helped us to find facial features.
We looked up at the different bones and muscles, that helps us to understand the human anatomy better, while sculpting our model.
Talked about the fats, that person loses, when he is getting old and more defines facial shapes.

Skull drawing/Week2


This week, we were drawing skull to understand the basic of a human anatomy.
We were looking into Loomis Abstraction Method and Reilly Abtraction Method. How different artists developed different methods of drawing a human skull.
We were drawing human skull from 3 different sides. The easiest one was the side, as it appeared to be harder to draw front of the skull correctly.
Clay Sculpting/Week 3 and 4
Ears
In this session we tried to clay model different facial features.
With this exercise, it helped us to feel and see better of each different line.
Very important part when making ear is "y" shape and a canal that is in the ear.
Not forgetting to rotate is very important, so that our model would not be flat.


Nose
To make the nose it is important to remember about the 'tear shape' around the nostrils
Nose is not flat, up to the mid of it, there is a bone.


Eyes
To make eyes, we need to start of with a sphere and eyelids. Smooth everything out and make sure to have and eye tear bit.
Make eyelids not too thin and the eyelashes grows from inside of the eyelid line, not on top.

Lips
To make lips, need to do them from smaller shapes.
Do not forger about a bean-shaped 'wrinkle' on the side of the lips.


Starting ZBrush / Week 5/6

Working with ZBrush Basics:
1. Model is called a Toll
2. Tools that you use to do changes are called Brushes.
3. Shift + f -> Wireframe
4. Dynamesh function -> increases polygons as you go, but it works for the whole object.
5. B -> to open Brushes menu
6. Main Brushes:
1. Standard Brush B+S+T
2. Clay Build-up Brush B+C+B
3. Dam Standard Brush B+D+S
4. Move Brush B+M+V
5. Polish Brush B+P+O
6. To smooth -> hold Shift
7. S (or spacebar) -> to make changes for the brush size
8. Shift + snap -> to fix the rotation


Nose
For nose, I mostly used Standard Brush.
I tried to build up everything in to the general shape and smooth it out constantly.
Looking at the reference images is highly advisable.
Lips
To make lips, I used Dam Standard Brush and used the structure, that was advised.
By using symmetry and holding cmd button, I drew the top lip line and by using the brush itself, I made the mid of the lips and the wrinkles there.
Eyes
To make eyes, I simply appended subtools and sculptured around it, by trying to make a proper size eyelids.


Trying the head shape that ZBrush suggests in the Lightbox menu.

Live Boolean


Live Boolean - Helps to easily make a shape, that would be complex to sculpt. It also helps to use Boolean live, which means, in this case where we moved the subtool, depended how big the gap in the sphere was.
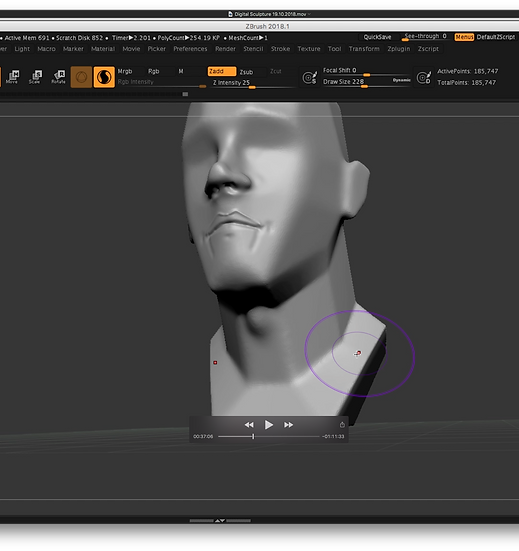
Villain Head / Week 7/8
References:


Polypainting

To Polypaint:
1.Select Material
2.Go to Color -> Select Color -> Fill Object
3.Turn Zadd and Turn on RGB
4.Select desired colour -> Paint on to the object
You can use alphas to help with detail as well as 'Spray'


LightSpot

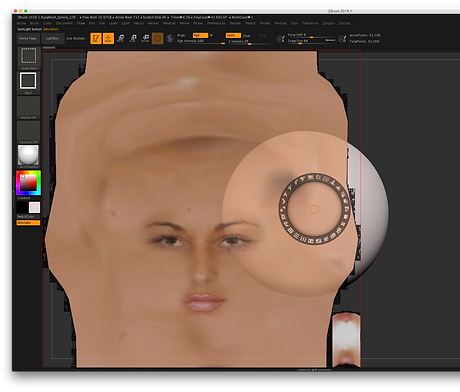
To add a SpotLight onto the tool :
1. Texture -> Import
2.Select the imported texture and press -> Add to the Spotlight (it will automatically select button on/off, next to it)
3. Scale, rotate and adjust and when ready, press Shift + Z and start painting onto the tool.
4.By repressing shift + Z you can turn on and off the the texture, so it will help to adjust, where you want it to be.


Process of sculpting villain's head:


In these pictures, I show how I started my sculpture.
Firstly, I started with a basic head shape, made shoulders and back.
Then I went straight for the face shape and facial features.
After I got the basic shape, I started painting.
I used the basic pastel pink for a body, then divided the forehead into a yellow, nose and cheek are into the red and bottom of the face in to the blue and blended everything together to get a basic face colour.
Adding the Detail:


In this step. I added the wrinkles, more skin detail, made an ear, and tried our the tattoos on his body.
The problem that I met was that tattoos were not clear.
I found out, that to get the best paint results, it is better to turn off Dynamesh button.
Eyes
The first video shows how I did the eye purely in Maya and the second one is made combining Maya and Zbrush (textures made in ZBrush as well).
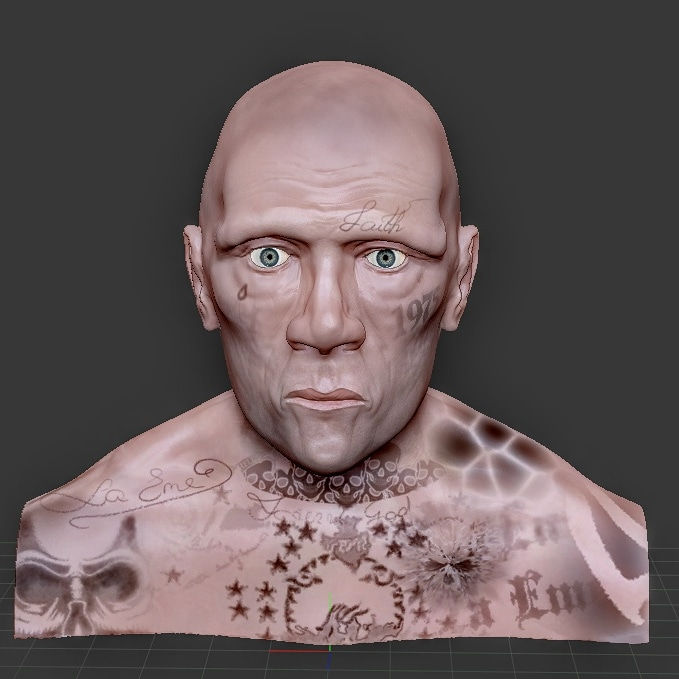
Final Work!


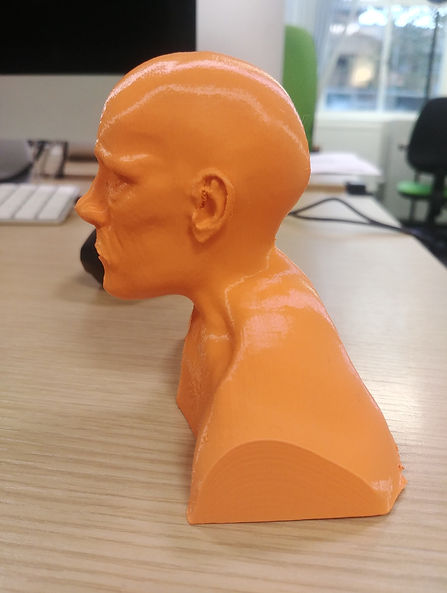
3D printed version:


Character Pose


References:
For a dynamic characters pose, I chose to have an 'Archer Girl'. It was very important to:
1. Look up the muscular structure
2. Recognize how muscles works when person is about to shoot and arrow
3. What muscles works, while using the strain on the arms
4. How muscles look and overlap other bits in the body.
I selected different images, to analyze possible poses and different angles.
Process:
To create the pose, I used ZSphere.ZPR.
By using extrude tool, scale and rotation, I created a pose.


